Sony Ericsson Xperia Mini Pro SK17i Teardown
SK17i Guide aint found anywhere on the www, so i figured i'd
make one for the kind ppl, whom has provided some great guiden for me
trough the repairs i've made :)
Please enjoy, and comment.

Step 1 — Sony Ericsson Xperia Mini Pro SK17i Teardown
-
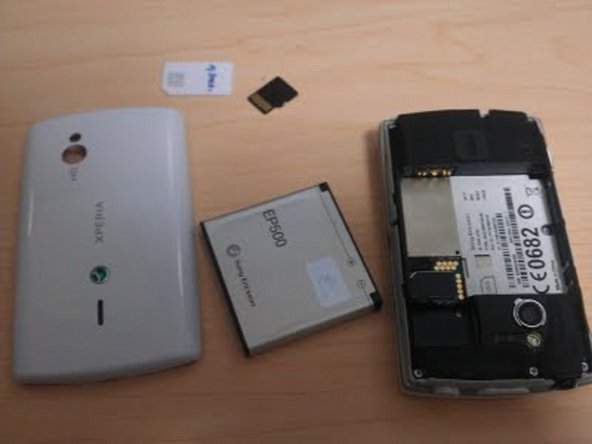
Turn Off the phone :), Remove back cover, battery and simcard + sd card from the phone!
Step 2
-
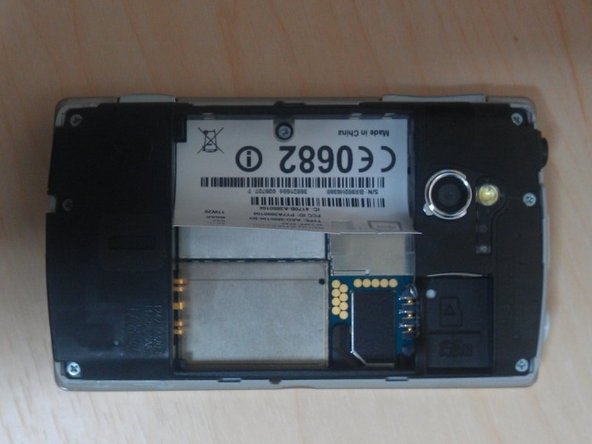
Behind the battery, you will have to remove the CE sticker!
-
Remove from Sim-tray and down, it wont break.
Step 3
-
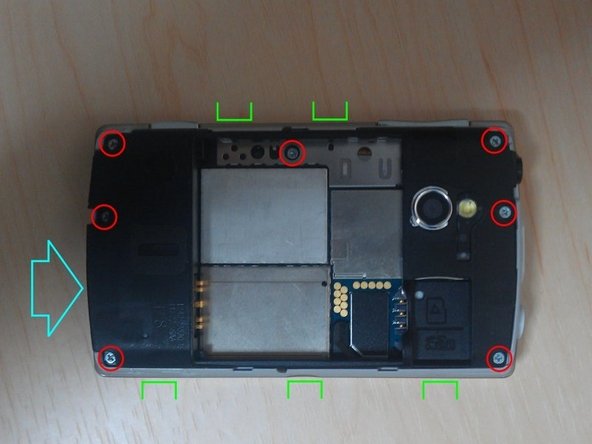
Remove 7 bolts.
-
Release clickholders, 5 pcs (green). The back should lift up from the surround.
-
Release from the bottom up.
-
Be careful around the camera, as theres a Flex cable right under it, attatched to the logicboard.
Step 4
-
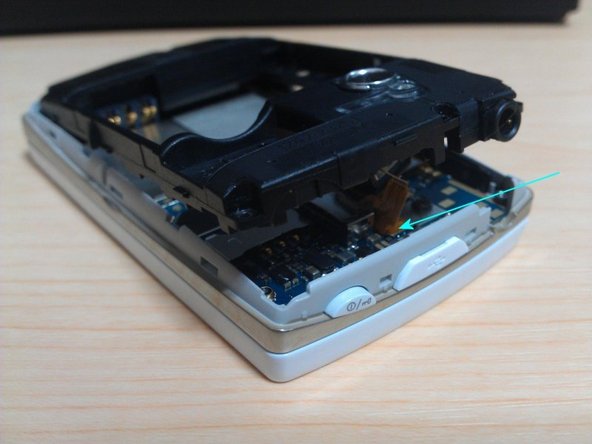
Release the Flex cable by lifting the lower end off the logic board, and lift off the back assembly.
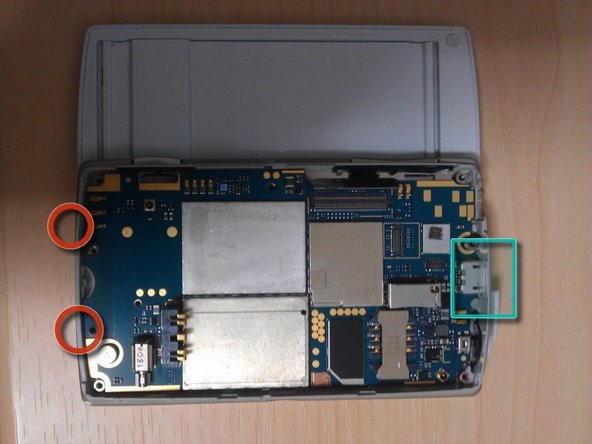
Step 5
-
Remove the logic/motherboard.
-
Push the motherboard from the keypad side, it should pop out
-
Be careful with:
-
the small clips...
-
...and the rubber USB port plug :)
-
the small clips...
-
Start loosening the board from the end with the 2 red circles.
Step 6
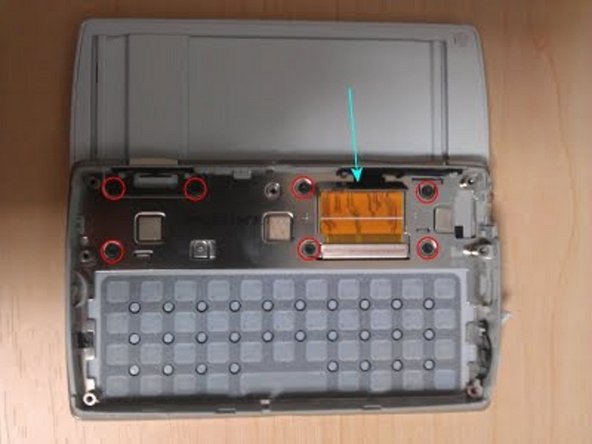
-
Release Screen flexcable + lift off of adhesive under flexcable!
-
Remove 7 bolts (black ones), holding the slide/screen in place.
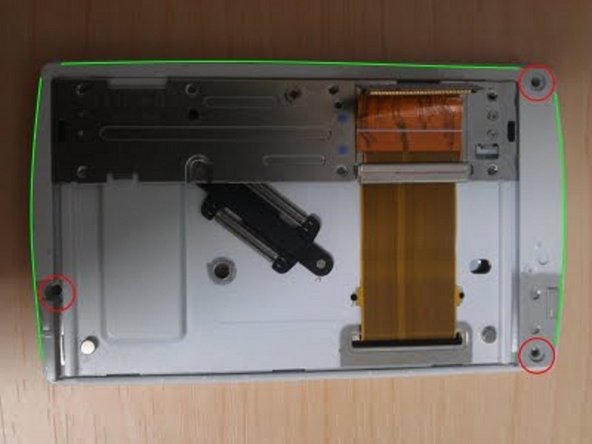
Step 7
-
Remove 3 bolts, top right one is covered, look carefully
-
The Green line, shows where to flick the slide off of the screen assembly!
-
Easiest way: is to flick it at the top, where you removed 2 bolts. It will come off, pretty easy.

Step 8
-
Once slide is removed, you got access to LCD and touch
assembly. Easily remove the small flexcable from touch to LCD and take
off LCD.
-
Only the Touch screen is left -> next.
Step 9
-
The LCD and the Touch glass CAN NOT be separated!!!!!!!!
-
Go to step 10!
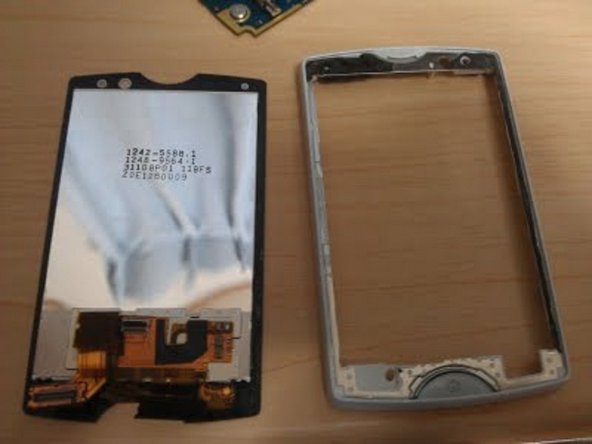
Step 10
-
Use a thin tool to wiggle the touch screen from the
metal+plastic frame, and then throw the lcd + touch screen into the BIN
(ONLY IF U NEED TO REPLACE LCD OR TOUCH SCREEN)
-
I hope this 10 step guide helps some of you guys out there!
-
AGAIN:
-
THE LCD + TOUCH GLASS CANNOT BE SEPARATED! BUY NEW ASSEMBLY!
Step 11
-
Please scan, and "like".
-
And comment on my guide if you want :)
-
Thanks for watching!
-
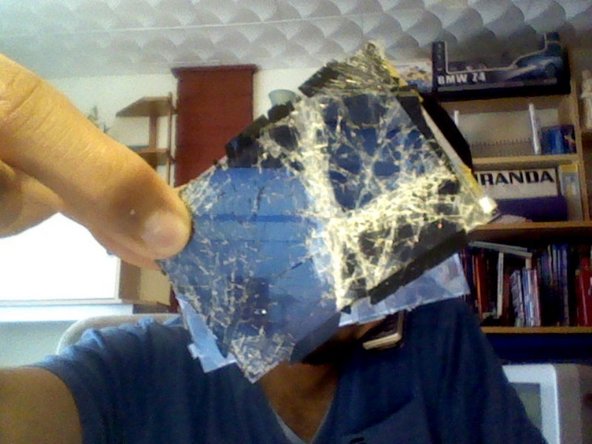
<-- #BadNews... This is what happens if you try removing the touch glass from the LCD

 Main board with access card inserted.